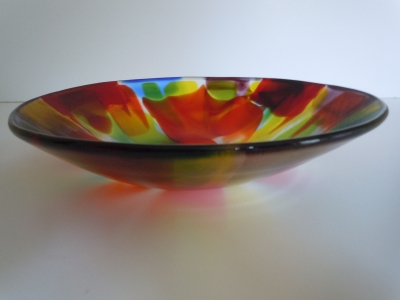
In my last post, the first of the year, I promised to do and THEN talk about it. After several months of home renovation which put both my in-home studio space AND my garage workshop (and ME) out of commission I am FINALLY putting the pieces back together . So without further ado I bring you — drum roll please:
This 10″ diameter, vibrant bowl was created using the “Kiln Pressed Glass” technique generously shared online at http://www.fusedglass.org. This multi-step, high temperature process is decidedly NOT for the faint of heart but the results are rewarding. To my knowledge there is no other way to get this watercolor effect in kiln-formed glass. For kindred spirits interested in process a picture(s) is worth a thousand words…
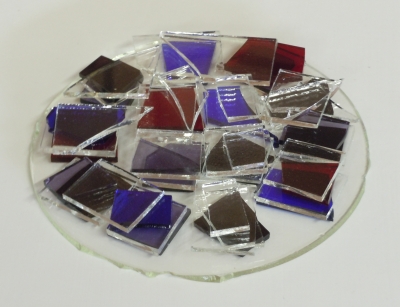
DAY 1: First comes the cutting and the weighing.
After cleaning the glass bits they’re set up in the kiln. Diameter starts at less than 6 inches:
And here’s the “pressed” part: loads of weights are stacked ON TOP OF THE GLASS. Yes, what you see above is indeed UNDER this:
With breath held and fingers crossed, the lid is closed and the firing cycle is programmed. Target temp is 1500 degrees with a lengthy hold. Entire cycle lasts nearly 24 hours. The result is over 8 inches in diameter, nearly 3 inches larger than the start:
DAY 2: After soaking to remove stuck on kiln wash, coldworking both surfaces with diamond hand laps then re-coating the kiln shelves and curing those (WHEW!) comes more glass cutting, cleaning and weighing (see step one) and THEN…
DAY 2 1/2: back in the kiln with the additional glass for the second firing:
It, too, is completely covered with loads of weights:
The next day…
The piece that started at somewhere between 5 1/2″ – 5 3/4″ is now 10 1/2″D with an overall thickness averaging just under 1/4″ according to my trusty calipers.
DAY 3: Next the piece went back into the kiln for a “Fire Polishing”: a lower temp and less lengthy process but basically adds a work day to the project. This provided a glossy top surface and a satin bottom (see pics at end).
DAY 4: Time to slump. The piece was centered and leveled on a bowl mold inside the Jen-Ken fiber kiln. Now when riding my motorcycle I endeavor to keep the shiny side up. But in this case I decided to go shiny side down and satin finish up top:
DAY 5: Here’s what I got when I opened the kiln:
And here are alternate snapshots of the finished piece which hopefully show at least a little the glossy exterior vs. satin interior finishes I achieved:
I am thrilled with the results and can’t wait to see how this technique will figure into my craft as a whole. Thanks for reading and stay tuned, Cube’sters!


